My Expenses
The My Expenses page lets you view and manage all your own business expenses. You can track the status of each expense, create new entries, and monitor your total spending.
From the sidebar, expand Expenses and click My Expenses.
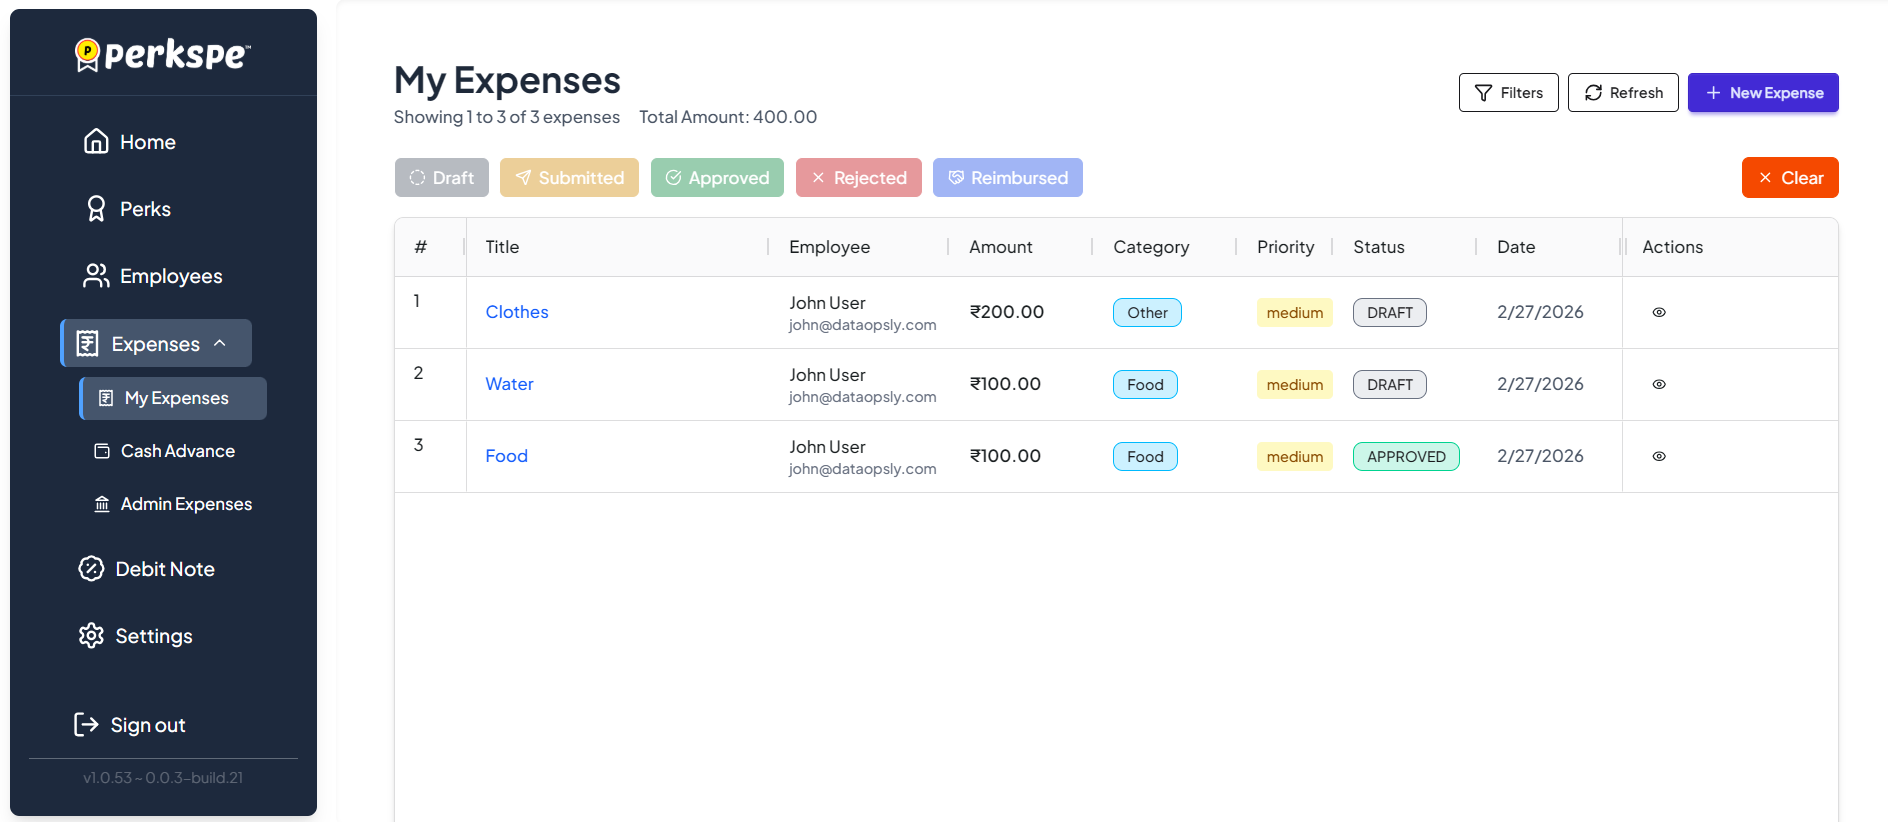
Dashboard Tracking
View your Total Amount at the top and track all submitted expenses.
Status Filters
Use the status chips (Draft, Submitted, Approved) to quickly filter your list.
New Expense
Click the + New Expense button to start a new reimbursement request.
Creating a New Expense
Click the + New Expense button to add a new expense. The process follows these steps:
- Fill in basic information — Title, description, category, date, amount, and priority. See Adding a New Expense for full details.
- Add vendor information — Vendor name, details, receipt number, and tax amount.
- Set location — Where the expense occurred.
- Fill in custom fields — Provide any organization-specific details defined by your administrator.
- Attach receipts — Upload supporting documents (JPG, PNG, PDF).
- Save or Submit — Save as draft or submit for approval. See Draft or Submit for details.
Viewing and Editing Existing Expenses
Viewing Details Click the view icon (👁) in the Actions column or click the expense title to see full details including attachments and comments.
Editing Draft Expenses Expenses in Draft status can be edited before submission. Open the expense and update any fields as needed.
Adding Comments You can communicate with your approver by adding comments on an expense. See Comments for more details.